

The Professional Guide on How to Prepare Walls Before Painting Minneapolis Homes
A flawless interior paint job is won or lost before a single paintbrush ever touches a can of color. While selecting the perfect shade of modern neutral or bold accent color gets the most attention, the secret to a durable, smooth, and professional-grade finish lies entirely in your surface preparation strategy. Skipping this crucial phase virtually guarantees paint failure, showcasing every underlying flaw, bubble, or peeling seam within months of application.
For homeowners in the Twin Cities, understanding the exact mechanical steps required to remediate surfaces is essential to protecting your property investment. Environmental shifts across the Midwest marked by freezing winters and humid summers cause drywall, plaster, and timber framing to expand and contract continually. This shifting places unique stress on your walls.
Taking the time to master how to prepare walls before painting Minneapolis interiors ensures that your topcoat adheres permanently, resists cracking over time, and delivers the high-end aesthetic your home deserves.

Why Proper Surface Prep is Non-Negotiable
Paint is not a structural filler; it is an incredibly thin liquid film that cures over a surface. Rather than hiding cracks, dents, textures, or imperfections, a fresh coat of semi-gloss or eggshell paint acts like a magnifying glass, drawing attention to every single blemish that wasn’t properly resolved beforehand.
Furthermore, paint requires a clean, chemically stable, and mechanically sound profile to bond securely. If your walls are covered in a microscopic layer of dust, kitchen grease, oils, or failing old layers of paint, the new liquid coating will bond to that contamination layer instead of the actual wall. Over time, this weak bond results in blistering, flaking, or peeling, especially in high-moisture areas like kitchens and bathrooms.
Investing energy into comprehensive prep work saves money on premature fixes, minimizes material waste, and ensures your home looks professionally tailored.
| Preparation Stage | Key Actions Involved | Core Objective / Benefit |
| 1. Site Clearing & Protection | Remove hardware, mask trim, lay drop cloths | Protects floors, furniture, and fixtures from splatter |
| 2. Surface Cleaning | Wash down with TSP substitute and warm water | Removes oils, grease, and dust to ensure adhesion |
| 3. Mechanical Repair | Patch holes, sand imperfections, caulk gaps | Creates a visually flat, uniform structural canvas |
| 4. Architectural Priming | Apply specialized sealer or stain-blocker | Controls porosity and locks out old bleed-through stains |
Step 1: Clearing the Room and Setting Up Protection
Before executing any physical modifications to your walls, you must establish a secure workspace. Remove all hanging artwork, window treatments, and switch plates. Place small screws and hardware into labeled bags so they are not misplaced during the project. Move all heavy furniture out of the room entirely, or push it to the absolute center of the space and seal it completely with heavy-duty plastic sheeting.
Protecting your flooring requires more than just throwing down thin plastic tarps. Plastic shifts easily underfoot, creates a slick slipping hazard, and can trap paint spills underneath if punctured. Instead, professionals utilize heavy canvas drop cloths or thick contractor felt paper taped securely along the perimeter.
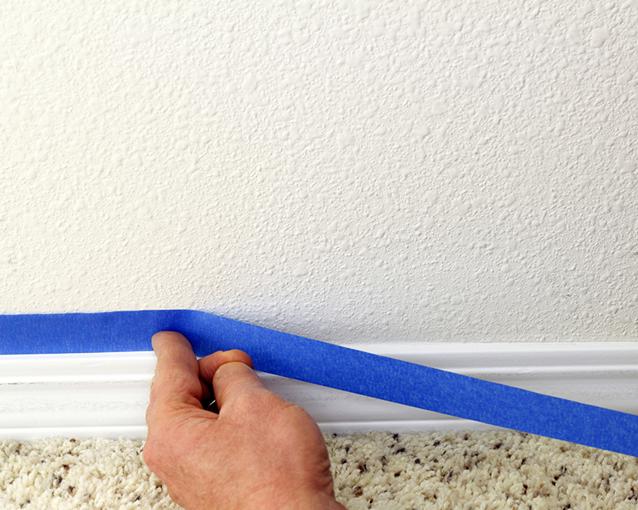
Take your time running high-quality painter’s tape along the top edge of your baseboards, around door frames, and against window casings, pressing down firmly with a putty knife to seal the edge against leaks.
Step 2: Deep Cleaning to Ensure Chemical Adhesion
It is easy to assume a wall is clean just because it looks white, but human hands, cooking vapors, pets, and everyday heating systems leave behind invisible residues. If you are researching how to prepare walls before painting Minneapolis kitchens or high-traffic hallways, deep chemical cleaning is a critical baseline step. Dust the walls from ceiling to floor using a microfiber mop or vacuum attachment to clear cobwebs and loose debris.
Next, wash the surfaces using a sponge dampened with warm water and a mild surfactant or a heavy-duty cleaner like Trisodium Phosphate (TSP) substitute. Focus heavily on areas around light switches, door jambs, and baseboards where skin oils and scuff marks accumulate.
If you are dealing with older properties built prior to 1978, be aware that existing paint layers may contain lead. According to guidelines set by the U.S. Environmental Protection Agency (EPA), disturbing lead paint through dry scraping or sanding can release hazardous toxic dust into your living space, requiring specialized containment protocols. Once washed, wipe down the walls with clean water and allow them to dry completely for at least 12 to 24 hours.
Step 3: Patching, Sanding, and Filling Structural Defects
With clean surfaces, you can now address mechanical defects like nail holes, settling cracks, and dents. For small dents and holes, apply a lightweight spackling compound using a flexible 3-inch putty knife. Force the compound deep into the defect, then draw the knife firmly across the wall at a 45-degree angle to leave the patch flush with the surrounding drywall. Keep in mind that spackling shrinks slightly as it dries, so leave a tiny mound over larger defects to accommodate this shift.
For dynamic settlement cracks frequently seen around door corners and window frames in older Minnesota homes simple spackling will crack again as the home shifts. Instead, widen the crack slightly with a utility knife to create a clean channel, fill it with a premium elastomeric spackling, or bridge the gap using fiberglass mesh tape embedded in joint compound.
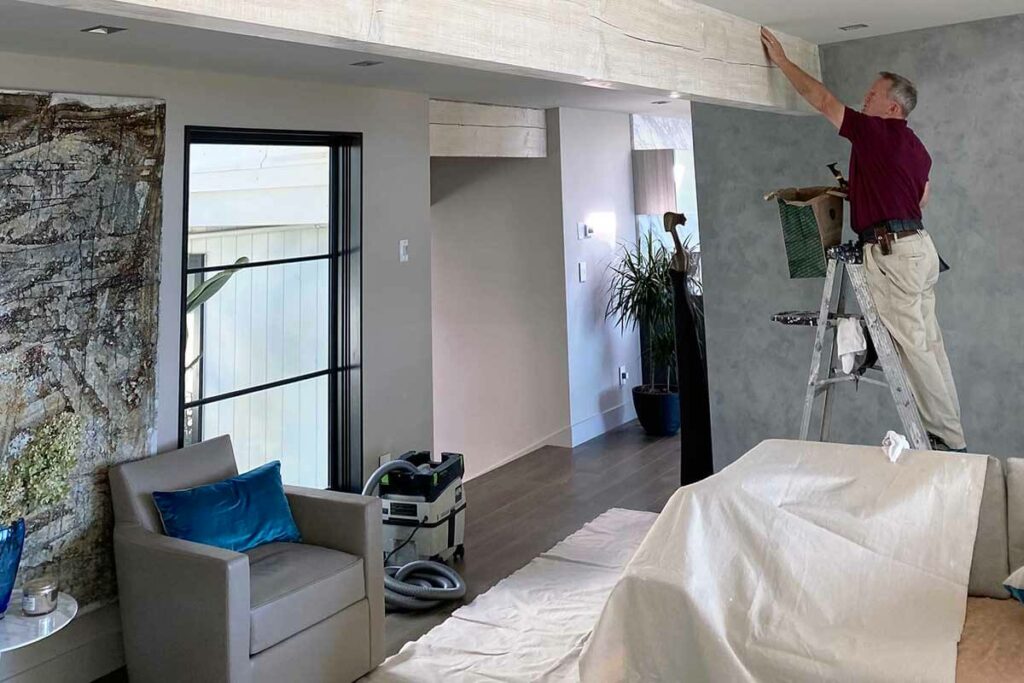
Once your patches are thoroughly dry, sand the entire wall surface using 120-grit to 150-grit sandpaper. Vacuum the resulting drywall dust completely off the walls and trim to prevent it from contaminating your wet paint.
Step 4: The Crucial Role of Priming
The final phase of comprehensive surface preparation is priming. Many modern retail paints are marketed as “Self-Priming” or “Paint and Primer in One,” which works perfectly fine over pristine, previously painted drywall in great condition. However, if your project involves bare drywall patches, water stains, smoke damage, dramatic color shifts, or glossy oil-based paints, a dedicated primer is absolutely necessary to guarantee success.
Primer acts as a dedicated bonding agent that bridges the gap between raw substrate and your finish coat. It seals porous materials like raw joint compound, ensuring that the topcoat absorbs evenly across the wall rather than sinking into patches and leaving dull, spotty sections (a defect known as “flashing”).
Furthermore, if you are painting over wood knots or water marks, a stain-blocking primer seals those contaminants chemically, preventing them from bleeding through your beautiful new finish over time. If you prefer to skip the stress and labor of managing this meticulous process yourself, partnering with an elite local service provider like Brennan Heikes Painting ensures every phase of wall rehabilitation is completed flawlessly.